Gateway
How to access:
- Step 1: Log in to console.fptcloud.com
- Step 2: After signing in, select the VPC whose Gateway data you want to view
- Step 3: In the sidebar, expand the Network menu → select Gateway
This feature is only available for selected Tenants with a special configuration. Please contact support to have it enabled.
Manage the Gateway list
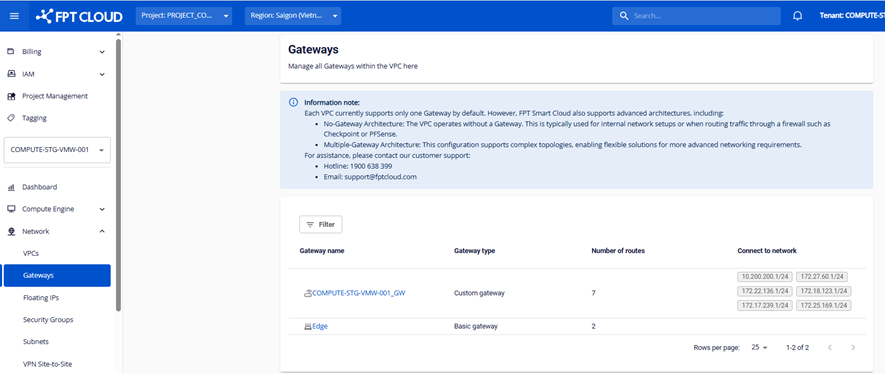
On this screen you can manage the list of Gateways for a VPC.
A Gateway's information includes:
- Gateway name: The Gateway name. Click to open the Gateway detail page.
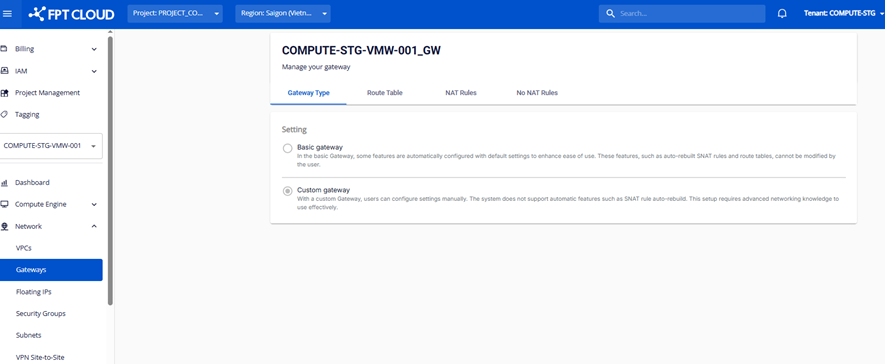
- Gateway type: There are two types
- Basic: a Gateway provisioned automatically with default settings, ready to use.
- Custom: a Gateway that allows you to configure settings manually for specific needs.
- Number of Route: The number of Routes on the Gateway.
- Connect to Network: The Gateway's connection to a specific network.
The Gateway Type tab shows the Gateway type information.
Manage Routes on a Gateway
1. Manage the Route list
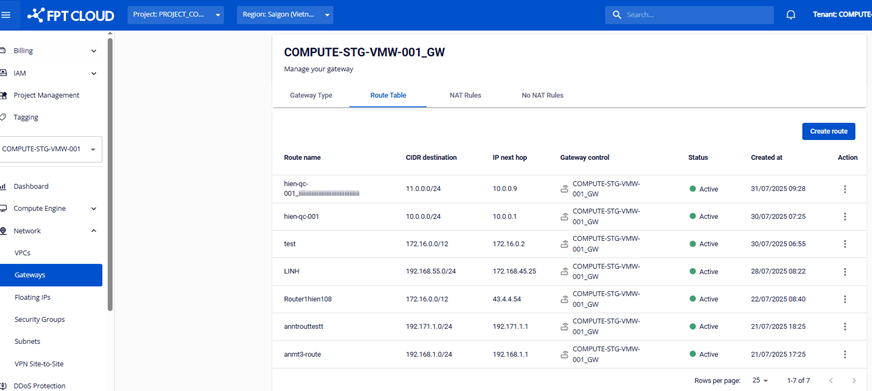
A Route's information includes:
- Route name
- CIDR Destination
- IP next hop
- Status
- Created at
2. Create a Route
Click Create route to create a new Route.
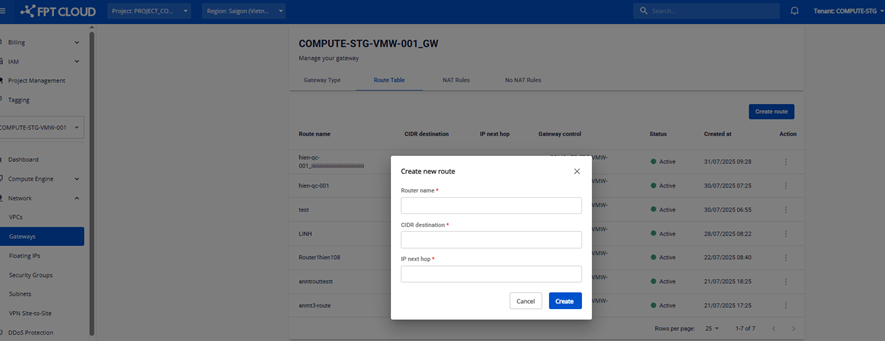
- Basic Gateways do not allow creating Routes; Routes can only be created on Custom Gateways.
3. Edit a Route
In the Actions column, click Edit to modify the Route.
- Basic Gateways do not allow editing Routes; only Custom Gateways do.
4. Delete a Route
In the Actions column, click Delete to remove the Route.
- Basic Gateways do not allow deleting Routes; only Custom Gateways do.
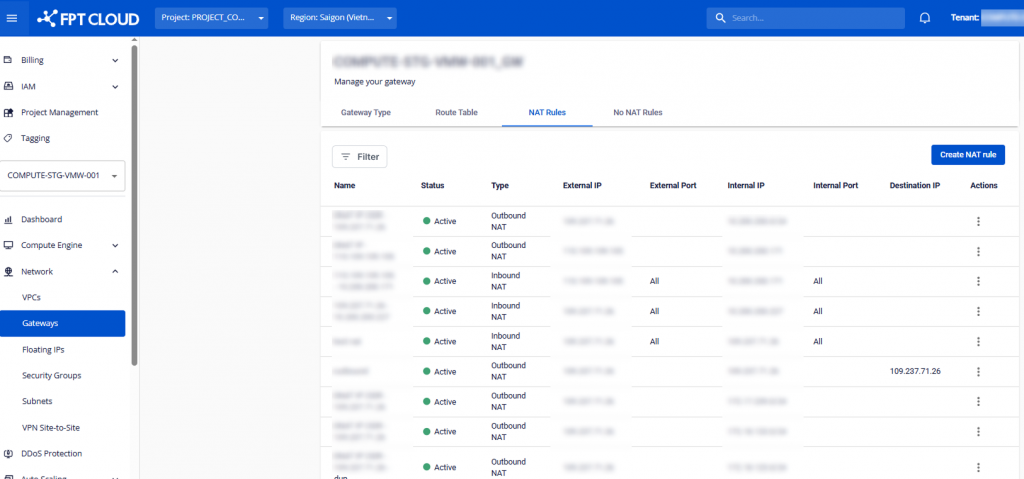
Manage NAT Rules per Gateway
1. Manage the NAT Rule list
You can filter NAT rules.
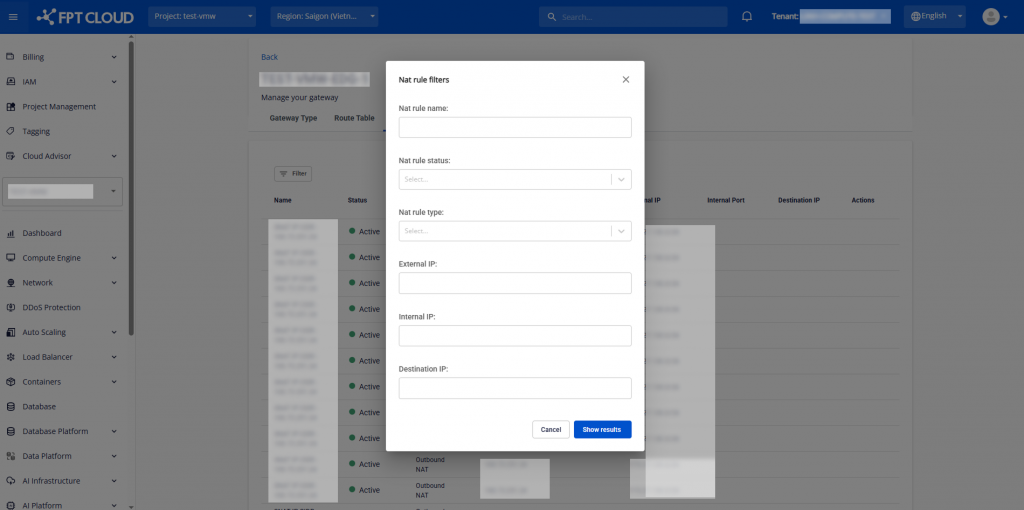
Filter fields:
| Field | Meaning |
|---|---|
| Nat rule name | Enter the full or partial NAT rule name. The system filters by substring. Example: enter "web" to find rules like "web-nat-01", "web-service-nat". |
| Nat rule status | Dropdown for NAT rule status: Active, Inactive, Pending, Deleting. Use to filter active or disabled rules. |
| Nat rule type | Dropdown for NAT rule type: Outbound NAT (SNAT), Inbound NAT (DNAT). Example: pick Outbound NAT to only show rules translating internal IPs to public IPs. |
| External IP | Filter NAT rules by Public IP (External IP). Enter the external IP used by the rule. IPv4 only. Example: enter 203.113.1.15 to find all rules using this IP as SNAT or DNAT. |
| Internal IP | Filter NAT rules by an instance's Internal IP. Enter the private IP inside the VPC. IPv4 only. Example: enter 10.10.5.21 to view this Instance's NAT rules. |
| Destination IP | Filter NAT rules by destination IP in a DNAT or forward rule. Use this when looking for rules that forward traffic to a specific IP. Private or public IPs accepted depending on rule type. Example: enter 172.16.100.50 to view rules forwarding traffic there. |
2. Create a NAT Rule
Click Create NAT Rule to create a new NAT Rule.
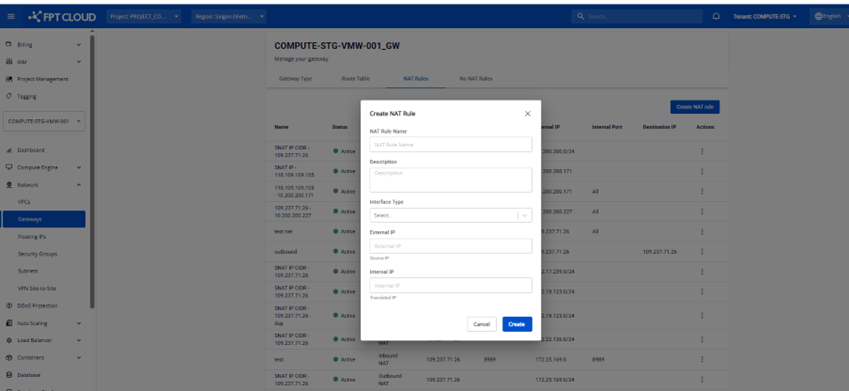
There are two NAT types:
- Inbound NAT: Manages traffic flowing from outside into the internal network.
- Outbound NAT: Manages traffic flowing from the internal network to the outside.
3. Edit a NAT Rule
In the Actions column, click Edit to modify the NAT Rule.
- Basic Gateways do not allow editing NAT Rules; only Custom Gateways do.
4. Delete a NAT Rule
In the Actions column, click Delete to remove the NAT Rule.
- Basic Gateways do not allow deleting NAT Rules; only Custom Gateways do.
Manage NO NAT Rules per Gateway
1. Manage the NO NAT Rule list
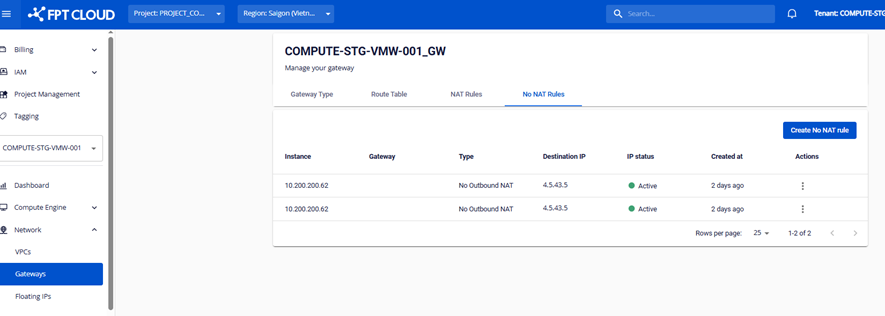
2. Create a NO NAT Rule
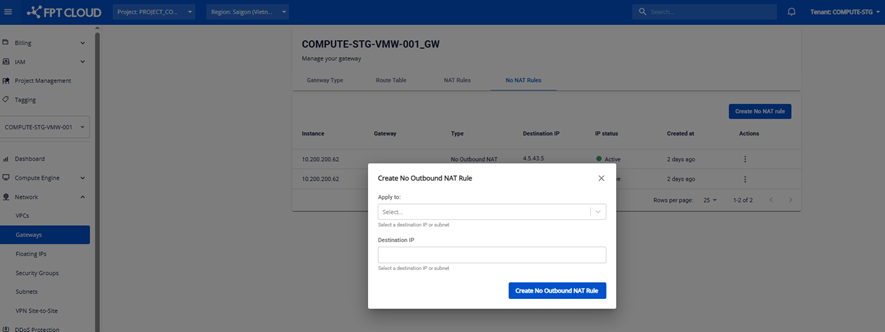
There are two NO NAT types:
- NO Inbound NAT
- NO Outbound NAT
3. Edit a NO NAT Rule
In the Actions column, click Edit to modify the NO NAT Rule.
4. Delete a NO NAT Rule
In the Actions column, click Delete to remove the NO NAT Rule.
Other features related to Gateway
1. Allocate IP Address
On the Floating IP screen, you can select a Gateway when allocating an IP. Hover over the Gateway tooltip to see whether it is Basic or Custom.
- If a Custom Gateway is selected, you can only allocate an IP without attaching it to a resource (Resource, IP Port and Instance Port fields are hidden).
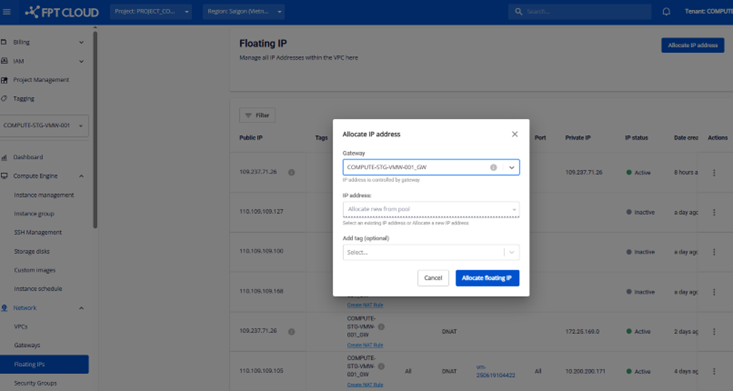
- If a Basic Gateway is selected, you can allocate an IP and attach it to a resource at the same time.

- On the Floating IP screen (Actions column), an IP belonging to a Custom Gateway cannot be attached to an Instance.
- On the Instance Detail screen, if the Instance has no IP assigned and you click allocate IP while the Instance belongs to a Custom Gateway, IP assignment is not allowed — you must create a NAT Rule instead.
2. Instance
- When creating an Instance, the system auto-fills the Gateway based on the previously selected Subnet (the Gateway attached to that Subnet). If the Gateway is Custom, the Floating IP field is disabled.

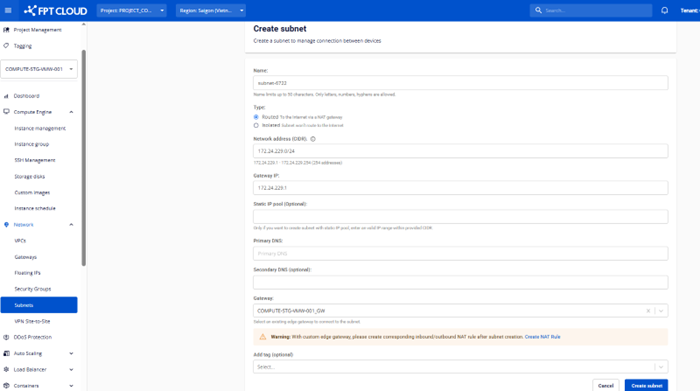
3. Subnet
- On the Subnet creation screen, you can select a Gateway. If the Gateway is Custom, the system notifies you to create a NAT rule yourself.
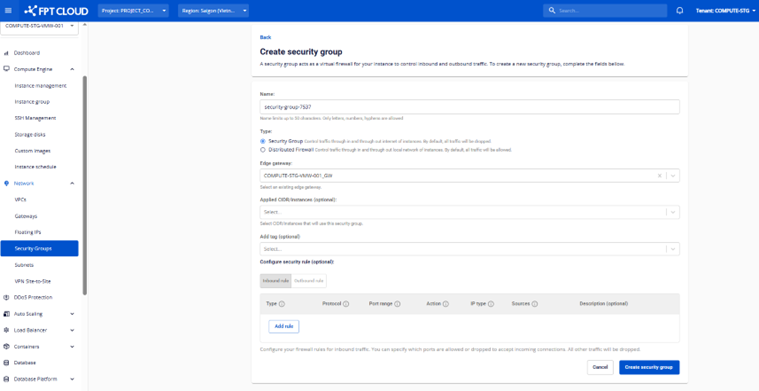
4. Security Group
- On the Security Group creation screen, you can pick a Gateway. Security Rules created will be managed by the selected Gateway.
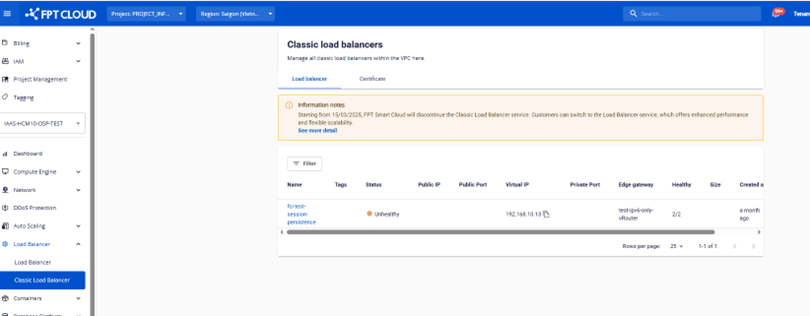
5. Load Balancer
- You can view Gateway information when using a Classic Load Balancer.
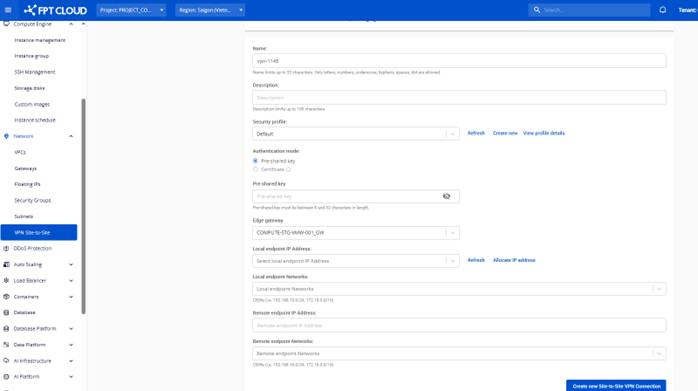
6. VPN Site to Site
- You can select a Gateway when creating and using the VPN Site to Site service.